Call Today! 1300 366 569

  Our Services Repairs Gallery Testimonials Diagnosing a Leak Understanding a Leak FAQ Contact Us  
The Shower Repairs Plus advantage
95% of showers can be sealed with our Standard Seal Service. “Leaking showers repaired - with no tiles removed"
Click on the job you need done below for details and pricing.
Quick Contact Form

Name:

Phone:

Email:

A few words about your enquiry:

    Home » How to guides Print this page Email this page
Services and Help
- Why Showers Leak
- Diagnosing a Leak
- How to fix leaking showers
- Free Brochure Request
- Testimonials
- Natural Stone Care, DiaOseal specialises in the refurbishment, cleaning, polishing and maintenance of all natural stone surfaces.
- 12-Year Written Warranty, Your leaking shower will be professionally re-grouted and sealed and protected by warranty for over a decade. Free repairs.
- Where We Work, DiaOseal offers shower leak repair services in both Sydney - Metropolitan and NSW - Regional areas
- DiaOseal Waterproofing System, Our pioneering extra-durable solution that’s never failed.
- Payment Options, Mobile EFTPOS, cash, credit and debit card.
- Watch us on YouTube, Visit the DiaOseal YouTube channel.
- Official Standards Broadening homeowners’ and tradespeople’s awareness of waterproofing (pdf).

Expertise & Support

Chat with a support representative by phone, please call 1300 366 569

- Contact Us
- FAQ - Your Top 10 Questions Answered
- Business Partner Lead Form
- Media Releases
- Helpful ‘How To’ Guides from DiaOseal’s service manual

Glossary of Terms
A B C D E F G H I J K L M N O P Q R S T U V W X Y Z


Helpful Guides from the DiaOseal service manual.


How to:
Tap Service Guide - How to change a tap washer

How to:
Pressure test you shower assembly or breeching piece

What to:
What to do in the case of a broken pipe

What is:
What is Water Hammer

What is:
The effective waterproofing detail prior to the application of a membrane


DiaOseal SERVICE MANUAL – Tap Service Guide

by Trent Moreland, SRP general manager


Water tap washers can fail at any time and the result is a constant dripping and loss of water.

Many leaking showers attended to by DiaOseal technicians are a direct result of an incessant dripping showerhead caused by worn or inferior tap washers. Incessant dripping saturates the shower base and penetrates below the tile surface to the screed, made of a mix of sand and cement.

If you picture the screed as a sponge and place it under a dripping tap, it would absorb water until it reached a point of saturation, and start dripping.

If your membrane has failed or is there isn’t one at all, then there is no containment of the water. A failed or leaking body washer, is another common cause of leaks, resulting in water penetrating the wall space or material.


Tap Service Guide.

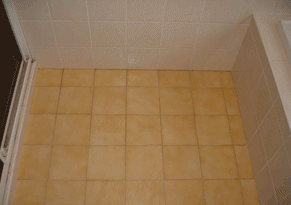
DiaOseal performs a pressure test and full tap service on every shower as part of our Standard Seal Service.

1.TURN OFF THE MAIN WATER SUPPLY, usually located at the front of the premises. (See below for helpful hints.)

2. SPINDLE REMOVAL and REFACING

  • Make sure the spindle penetration is free of grout, glue cement etc.

  • If required chip away any tile encroaching or restricting the removal of the spindle.

  • Turn the spindles on before unscrewing from the body.

  • Use your tube spanner to remove the spindle.

  • With the back of your knife blade, clean the body washer seat making sure it is flat and the channel is clean.

  • Using the tap reseater (refacing tool), to reface the seats within the recessed bodies using a smooth even pressure. Use your torch and make sure the seat is perfectly flat evenly around and clean.

  • With the vacuum and your little finger, clean out the body making sure it is free of brass shavings.

3. CLEAN and LUBRICATE

  • Remove the spindle completely from the bonnet by unscrewing.

  • Clean the body washer seat of the bonnet with your knife.

  • Clean the outer thread and washer seat of the bonnet with your wire brush.

  • Screw the thread cleaner into the bonnet to remove foreign matter from the bonnet.

  • Clean spindle thread using your wire brush and finish by wiping clean with your towel or rag.

  • Replace ‘O’ ring on spindle.

  • Lubricate the threads on the bonnet and spindle using Hydroseal tap lubricant.

  • Fully screw the spindle into the bonnet.

4. WASHER REPLACEMENT

  • Choose the right size fibre washer for the seat, do not use a narrow washer on a wide seat or vice versa

  • Place new valve in spindle.

  • Screw spindle into recess body and tighten being careful not to over tighten as it is possible to damage the fibre washer.

  • Place a tap handle on the spindle and screw the valve closed.

  • Turn off any another taps you have turned on within the bathroom.

  • Turn on main water supply.

  • Check the spindle penetrations for leaks and drips from the fibre washer.

  • Fully screw the spindle into the bonnet.

Helpful Hints

Isolation Valves  

Unit location could be:

  • Next to toilet Under the sink.
  • Under the laundry tub
  • Outside bathroom window on wall.
  • Behind panel inside kitchen cupboard.
  • If unable to locate it, ask neighbours.

House location could be:

  • Along the front boundary/fence line.
  • Look at the neighbours, usually they’re in the same location for each property.
  • Recycled water suburbs have two meters; make sure you have the right one turned off.
  • In the vicinity of the front tap.

General Information.

If the house is very old the hot water service can be in the roof.

Before you unscrew the spindle turn on another set of taps in the bathroom, e.g. basin set or bath set to release any pressure and drain excess water from the lines.


www.diaoseal.com.au | t. 1300 366 569

Privacy Statement | Legal Statement | Terms and Conditions of Trade | Copyright © 2009 DiaOseal.